Tag: Sourdough

  • Simple Sourdough Sandwich Bread

    Simple Sourdough Sandwich Bread

    There is something deeply comforting about working a small bowl of dough with your hands, watching it come together slowly and patiently. Sourdough has a way of slowing us down – of inviting us to breathe, to soften, to remember that good things often rise in their own time.

    On the Prayer Porch, we often talk about the holiness of simple things: light on a windowsill, a warm mug between your hands, a loaf of bread cooling on the counter. Bread feels like a small miracle – flour, water, and salt turning into something nourishing, warm, and shared.

    And maybe that’s why making sourdough feels like prayer.
    It teaches patience.
    It invites trust.
    It reminds us that rest, waiting, and quiet growth are not wasted time.

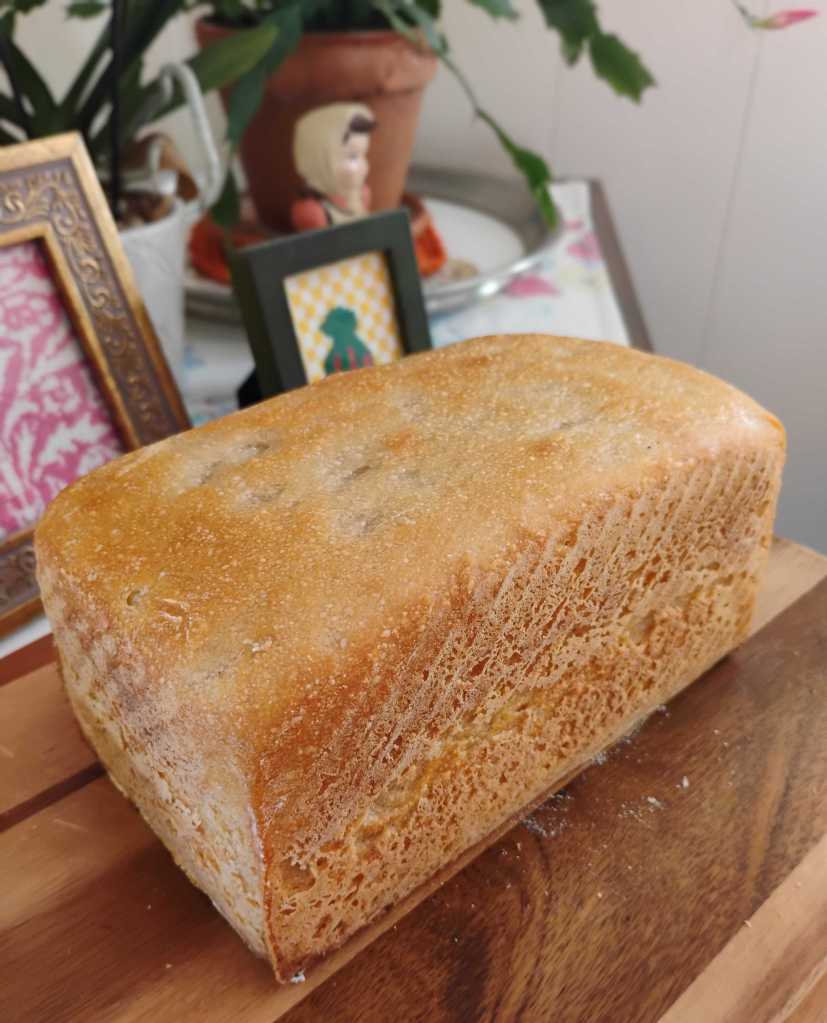
    If you’re longing for something simple and grounding to bake this week, here is a gentle sourdough loaf you can make in a bread pan, perfect for sandwiches.


    Ingredients

    • 100g active sourdough starter
    • 360g warm filtered water
    • 400g all-purpose flour + 100g oat flour
    • 10g salt
    • Bread pan (optional but recommended):

    Prepare the Dough

    1. In a large bowl, add 100g active sourdough starter.
    2. Add 360g warm filtered water and stir until dissolved.
    3. Add 500g flour and 10g salt. Mix with your hands until no dry pockets remain.
    4. Cover the bowl with a cloth and rest for 1 hour.
    5. Perform 4 rounds of stretch-and-folds, every 30 minutes.
    6. After the fourth round, cover and let it bulk ferment on the counter for about 2 hours, or until the dough has risen 50–75%. (Warmer homes may rise faster.)

    Shaping

    1. Lightly flour the counter.
    2. Shape the dough into a rectangle. Fold one side toward the center, then the other, and roll it up into a loose ball. Tighten the shape gently by pulling the dough toward you in a circular motion 3–4 times.
      Let rest 30 minutes.
    3. Repeat the shaping one more time.
      Place the dough seam-side up into a loaf pan dusted with white rice flour.

    Proofing

    1. Cover with a towel or plastic wrap and place in the refrigerator for up to 48 hours to cold-proof.

    Baking

    1. Preheat oven to 375°F.
    2. Bake covered for 35 minutes.
    3. Uncover and bake for an additional 10 minutes.
    4. Remove from the pan and let cool at least 1 hour before slicing.

    A Prayer as the Bread Rises

    Lord,
    Teach us to trust the slow work of rising.
    Help us to rest when we are tempted to rush,
    to soften when life feels hard,
    and to remember that small, quiet growth is still growth.
    Bless the hands who bake,
    the home this bread fills,
    and the hearts gathered around the table.
    Amen.

  • Homemade Sourdough Pasta Recipe

    Homemade Sourdough Pasta Recipe

    Sometimes the most comforting things come from the simplest ingredients. Flour, eggs, a little salt, a splash of olive oil, and a spoonful of sourdough starter that’s been faithfully waiting in the fridge. There’s something grounding about making pasta by hand -slowly, gently, without rushing. It invites us to pause, to press into the rhythm of kneading and rolling, and to remember that nourishment doesn’t always begin in the kitchen but often in the quiet places of the heart.

    Homemade sourdough pasta has a way of reminding us that even scraps, the “discard” we might have thrown away can become something beautiful and satisfying. God does this with us too. Nothing is wasted in His hands.

    So if your days have felt hurried or heavy, let this be an invitation to step into a slower moment. Tie on an apron. Dust the counter with flour. Let your hands remember the ancient work of turning simple ingredients into something warm and sustaining.

    Here is a pared-down, easy version of sourdough pasta you can make on any cozy afternoon.


    Simple Sourdough Pasta

    Ingredients

    3 cups all-purpose or whole wheat flour (or a mix)
    ⅓ cup sourdough starter discard (unfed sourdough starter)
    2 large eggs
    1 tablespoon olive oil
    1 teaspoon sea salt
    1–2 tablespoons water


    Instructions

    1. Mix the dough
      Place the flour in a mixing bowl. In a smaller bowl, stir together the sourdough discard, eggs, olive oil, and salt. Pour the wet mixture into the flour and stir with a fork until clumps form. Add water a teaspoon at a time until the dough comes together. It should feel firm, not sticky.
    2. Knead
      Turn the dough onto a clean counter and knead for 10 minutes until smooth and elastic. Shape into a ball and wrap tightly, let it rest for an hour or two on the counter.
    3. Roll it out
      Divide the dough into 2 pieces, keeping each wrapped until needed. Roll out one piece at a time using a rolling pin. Dust with flour as needed to prevent sticking.
    4. Cut your pasta
      Slice into noodles or your desired shape using a knife, pizza cutter, or pasta cutter. Lay the pieces on a board or drying rack for about 30 minutes before cooking.
    5. Cook and enjoy
      Boil in salted water until tender, usually just a few minutes. Serve with butter, olive oil, or your favorite sauce.

    As you roll out each piece of dough, may it be a small reminder that God is always shaping and stretching us – not to overwhelm us, but to make us more tender, more open, more able to receive His goodness. Even simple things like flour and eggs can become a gift. And so can quiet moments in our kitchens.

  • 3-Day Gluten-Free Garlic-Parmesan Sourdough

    3-Day Gluten-Free Garlic-Parmesan Sourdough

    There is something sacred about creating a gluten-free sourdough loaf – especially one crafted slowly over three gentle days. This recipe brings together nourishing grains, simple ingredients, and the quiet joy of tending something that rises in its own time.

    This loaf is soft, fragrant, and filled with a beautiful garlic-parmesan-spinach swirl. It feels like comfort and I hope it blesses your kitchen the way it did mine.


    🍞 Day 1 — Levain

    Levain Ingredients

    • 25g active gluten-free sourdough starter
    • 50g warm water
    • 50g oat flour

    Stir together until smooth.
    Cover with cloth or loosely fitted lid and let the levain ferment for 8 hours or overnight, until puffy and aromatic.


    🌤️ Day 2 — Dough

    Dough Ingredients

    • 60g white rice flour
    • 70g tapioca starch
    • 65g sorghum flour
    • 70g oat flour
    • 7g salt
    • 1 egg
    • 50g warmed milk
    • 40g honey
    • 175g warm water
    • 25g psyllium husk
    • 10g ground flaxseed
    • 2g finely chopped fresh dill
    • Levain from Day 1

    Instructions

    1. In a large bowl, mix all ingredients including the levain until a cohesive dough forms.
    2. Let the dough ferment in a warm place for 2 hours (in the oven with the light on works wonderfully).
    3. Cover the bowl and place it in the refrigerator overnight for the bulk fermentation.

    This slow, cool rise helps deepen the flavor and strengthens the dough.


    🌱 Day 3 — Filling, Shaping & Baking

    Filling

    • 20g melted unsalted butter
    • 2 cloves garlic, minced
    • 40g fresh parmesan cheese, grated
    • 20g spinach, chopped
    • 4g salt

    Prepare the Dough

    1. Remove the dough from the refrigerator and let it rest at room temperature for 30 minutes.
    2. Place the dough on a piece of parchment paper and gently roll or stretch it into a 12 × 10-inch rectangle. You will want to leave plenty of space to lift the parchment to transfer the dough to the Dutch oven.
    3. Spread the filling evenly over the dough.
    4. Roll it up carefully, then bring the ends together to form a circle. Pinch to seal. You could put a small glass in the center to hold the shape while proofing. Be sure to take the glass out before baking!

    Proof

    Let the shaped dough rise in a warm spot for 4–6 hours, or until it has nearly doubled in height.

    Bake

    1. Preheat the oven to 425°F.
    2. Place the dough (on its parchment) into a covered Dutch oven.
    3. Bake 22 minutes covered.
    4. Lower oven temperature to 375°F and bake 20 minutes uncovered.
    5. Cool completely before slicing – gluten-free sourdough sets as it cools.

    Your kitchen will smell heavenly.


    Bread has always been a symbol of care – a quiet reminder that nourishing others begins with nourishing ourselves. This gluten-free loaf invites us to slow down, to trust the process, and to honor the small moments of rising and resting in our own lives.

    May this recipe bring warmth to your home and beauty to your table.


  • Easy Guide to Gluten-Free Sourdough Starter

    Easy Guide to Gluten-Free Sourdough Starter

    There’s something so grounding about creating a sourdough starter from scratch – especially one that’s gluten-free and filled with the goodness of simple, wholesome grains. It’s one of those quiet kitchen rituals that reminds us how patient, slow work brings life and nourishment.

    If you’ve been wanting to bake gluten-free sourdough at home, this little guide will walk you through those first seven days with ease and encouragement. The ingredients are humble, the process is simple, and by the end of the week you’ll have a lively, bubbly starter ready to bless your baking.


    🌱 Ingredients

    Choose one flour or mix a blend you enjoy:

    • Oat flour
    • Buckwheat flour
    • Brown or white rice flour
    • Sorghum flour

    And:

    • Filtered water (this is important—chlorine can hinder wild yeast growth)

    🥣 Day-by-Day Instructions

    Day 1: Mix Flour & Water

    • Combine ¼ cup gluten-free flour with ¼ cup filtered water.
    • Stir vigorously, scraping down the sides.
    • Cover with a clean tea towel and let rest for 24 hours.

    Day 2: Discard & Feed

    • Discard half of your starter.
    • Add ¼ cup flour + ¼ cup water.
    • Stir well and cover.
    • Rest for 24 hours.

    Days 3, 4 & 5: Repeat the Daily Rhythm

    • Each day, discard half.
    • Feed with ¼ cup flour + ¼ cup water.
    • Cover and let rest another 24 hours.

    Days 6 & 7: Increase Feeding to Every 12 Hours

    • Continue the same discard + feed routine, but now do it twice per day.
    • By Day 7, your gluten-free starter should be lively, bubbly, and ready to bake with.

    📝 Notes & Helpful Tips

    • Gluten-free starters can take a little longer to get bubbly -especially if using buckwheat. Don’t lose heart! Consistency is key.
    • I personally like using oat flour and sorghum flour -they create a mild, pleasant starter.
    • Filtered water is best. Tap water with chlorine can slow or prevent the natural fermentation process.
    • Keep your starter somewhere warm (around 70–75°F if possible).

    🍞 Helpful Tools for Gluten-Free Sourdough

    Below are some tools I use and love. They make the sourdough process easier, cleaner, and more enjoyable.


    A Gentle Thought for the Journey

    There’s such a tender reminder in sourdough: growth happens quietly, steadily, and often unseen. All we’re asked to do is show up with consistency and care, trusting something beautiful is forming beneath the surface.

    May this little starter bring warmth to your kitchen and joy to your home.


    Affiliate Disclosure

    As an Amazon Associate, I earn a small commission from qualifying purchases at no extra cost to you. Thank you for supporting The Prayer Porch and the work that goes into each post 🌿

  • Homemade Porch Tarts

    Homemade Porch Tarts

    There’s something lovely about making a treat that slows you down. These little hand pies are buttery, jam-filled, and made with simple ingredients. They are sweet reminders that joy often comes from the quiet work of our hands.

    Ingredients:

    Crust:

    • 3 cups all-purpose flour
    • 1 teaspoon salt
    • 1 cup cold butter, grated
    • ½ cup sourdough discard along with a few tablespoons of ice water (a little more if needed)or ½ cup ice water if you are not using any sourdough discard
    • 1 egg, beaten with a splash of water

    Filling:

    • 1 cup strawberry jam or preserves

    Icing:

    • 1 cup powdered sugar
    • 1–2 tablespoons milk
    • Sprinkles (optional)

    Directions

    1. Make the dough:
      In a large bowl, mix the flour and salt. Cut in the cold butter with a fork until it looks crumbly. Add the sourdough discard and/or ice water and mix until the dough just comes together.
      Split into two balls, flatten slightly, wrap, and refrigerate for at least 30 minutes.
    2. Shape and fill:
      Preheat your oven to 350°F and line a baking sheet with parchment paper.
      Roll one dough ball out on a floured surface into a thin rectangle (about ⅛ inch thick). Cut into small rectangles.
      Spoon a little jam onto half of the rectangles, leaving space around the edges. Place the remaining rectangles on top, and press the edges with a fork to seal.
    3. Bake:
      Brush the tops lightly with the beaten egg mixture and bake for 22–30 minutes, until golden. Let them cool on the pan.
    4. Finish with icing:
      Stir together powdered sugar and milk, then drizzle over the cooled tarts. Add sprinkles if you’d like.

    Porch Reflection 🍂

    Lord, thank You for the sweetness of small things. Thank You for time to rest and to create. We remember that joy often rises from humble, handmade moments. Amen.

  • 🌿 Sourdough Fougasse

    🌿 Sourdough Fougasse

    This fragrant, rustic bread is shaped like a golden leaf. It can also look like a spooky ghost if you are baking in October. The bread is soft inside and crisp on the edges. It’s the perfect way to use your sourdough starter. It fills your kitchen with the smell of fresh herbs and olive oil.

    Recipe adapted from Healing Slice with gratitude for her beautiful inspiration.


    Ingredients

    Dough

    • ½ cup active sourdough starter
    • 1 ¼ cups water
    • 1 tablespoon olive oil
    • 3 ¾ cups bread flour
    • 1 ½ teaspoons salt

    Topping

    • 1 tablespoon olive oil
    • 1–2 tablespoons fresh or dried herbs
    • 1 teaspoon sea salt

    Instructions

    1. In a large bowl, whisk together the sourdough starter, water, and olive oil until the starter dissolves. Add the flour and salt, stirring until a shaggy dough forms. Cover and let rest for 30 minutes.
    2. Knead the dough for 3–5 minutes until it starts to come together. Place the dough into a lightly oiled bowl, cover, and rest 30 minutes.
      Do two stretch-and-folds about 30 minutes apart to build strength and structure.
    3. Let the dough rest in a warm spot. I have to put a few towels over the bowl because our home is chilly. Wait until it is doubled in size (6-8 hours).
    4. Once risen, cover and refrigerate overnight for easier shaping and deeper flavor.
    5. Turn the cold dough onto a floured surface. Divide into 4–6 pieces. Gently stretch each piece into a leaf or teardrop shape. You can also form a ghost by making 3 slits with a knife. Stretch the slits slightly bigger than you would like the holes to be. Transfer each piece to a parchment-lined baking sheet.
      Cover and let rest 30–45 minutes.
    6. Brush each piece with olive oil, sprinkle with herbs and salt.
      Bake at 375°F for 15–17 minutes, or until golden and crisp on the edges.
    7. Cool slightly before serving. This bread is a wonderful addition to an autumn soup or stew.

    Bread-making has always felt like prayer to me – slow, intentional, alive. Each fold and rise reminds us that rest brings growth, and warmth brings renewal. May your kitchen be filled with peace as you bake.🌾


  • Autumn-Inspired Pumpkin Shaped Sourdough

    Autumn-Inspired Pumpkin Shaped Sourdough


    This is a softly spiced sourdough loaf. It bakes up golden and tender. The loaf is shaped like a pumpkin, making it perfect for autumn gatherings or a cozy weekend bake. You will want to start this recipe early in the morning to allow time to bulk ferment.
    Day 1: Follow these directions
    Day 2: Bake

    Ingredients:

    • 4 cups all-purpose flour (I always use King Arthur flour)
    • ½ cup active sourdough starter (bubbly and recently fed) *see note at the end of the recipe
    • 1 cup + 1 tablespoon water
    • ½ cup pumpkin purée
    • 1 ¾ teaspoons salt
    • 2 teaspoons sugar
    • 1 teaspoon ground cinnamon

    Directions:

    Combine the ingredients

    In a large bowl, mix together the flour, starter, water, and pumpkin purée. Add salt, sugar, and cinnamon until it forms a shaggy dough. No kneading needed – just mix until combined. Cover and let rest (autolyse) for about 30 minutes.

    Stretch and fold

    Over the next few hours, do 4–6 stretch and folds, about 20 minutes apart. Gently pull the dough upward from one side. Fold it over the center. Turn the bowl a quarter turn each time.

    Bulk ferment

    Cover the dough tightly with a lid or plastic wrap. Let it rise at room temperature for 8 hours or until doubled in size.

    Shape and chill
    Shape into a smooth ball and place in a floured round bread proofing basket. Cover and refrigerate overnight.

    🎃 The Pumpkin Shape

    Preheat your cast iron Dutch oven to 450°F. Cut four 18-inch pieces of food-grade cotton string (not twine) and arrange them in a crisscross pattern on parchment paper.

    Remove your dough from the refrigerator and place it top-side down on the strings. Tie the strings gently around the loaf to create eight even pumpkin-like sections.
    Reduce oven temperature to 425°F and bake. Bake for 20 minutes with the lid on. Then, bake for another 20 minutes with the lid off. Allow the loaf to cool completely before removing the strings. Slice the bread after cooling.

    Notes 🧡

    Use food-grade cotton string — not kitchen twine or synthetic thread (they can melt or burn).
    Make sure your starter is lively and bubbly before beginning; this recipe relies entirely on natural fermentation for rise.
    For a rustic finish, brush the cooled loaf with a little melted butter. Tuck a cinnamon stick in the top to complete the “pumpkin stem.”

    🌾 Making Your Own Sourdough Starter

    If you don’t yet have a starter, you can create one easily at home with just flour, water, and patience. Combine ½ cup of whole wheat or all-purpose flour with ¼ cup of water in a clean glass jar. Stir well, cover loosely, and let it rest at room temperature. Each day, discard half and feed with the same amounts of fresh flour and water. Within 5–7 days, it will become bubbly and fragrant. This is your living, breathing leaven. It’s ready to bring new life to every loaf.

  • Easy Sourdough Peach Galette Recipe

    Easy Sourdough Peach Galette Recipe


    There’s something special about gathering simple ingredients, working with your hands, and watching them become something beautiful. This sourdough peach galette is just that. Rustic, free-formed, and filled with the sweetness of ripe summer peaches. Perfect to serve on the porch with a cup of coffee or tea.

    Ingredients:

    For the Sourdough Pastry:

    • 1 ½ cups all-purpose flour
    • 1 tbsp sugar
    • 1 tsp salt
    • ½ cup unsalted butter, chilled
    • ½ cup cold sourdough discard
    • ¼ cup ice water

    For the Peach Filling:

    • 6–8 ripe peaches
    • ½ cup granulated sugar
    • 1 tbsp lemon juice
    • 2 tsp cinnamon
    • pinch of salt
    • 1 ½ tbsp cornstarch

    For the Topping:

    • 2 tbsp heavy cream
    • 1 tbsp granulated sugar

    Directions:

    Make the Pastry:

    In a small bowl, stir together flour, sugar, and salt.

    Grate the chilled butter and toss it into the flour mixture.

    Add the sourdough discard and ice water. Use your hands to gently bring the dough together into a ball. If crumbly, add a teaspoon or two of extra ice water.

    Knead lightly (don’t overwork). Wrap and place in the freezer for 15–20 minutes while you make the filling.

      Slice peaches: cut in half, twist to remove the pit, then thinly slice.

      Place slices in a bowl and toss gently with sugar, lemon juice, cinnamon, salt, and cornstarch.

        Assemble the Galette:

        Preheat oven to 375°F.

        Roll the chilled dough into a 12–14 inch circle on lightly floured parchment paper.

        Arrange peach slices in the center, leaving a 2-inch border.

        Fold the dough edges up and over the peaches, patching as needed.

        Brush the crust and peaches with heavy cream, then sprinkle with sugar and cinnamon.

        Transfer parchment and galette onto a baking sheet.

          Bake at 375°F for 10 minutes. Lower heat to 350°F and bake another 30 minutes, until peaches are bubbly and the crust is golden.

          Cool slightly before slicing. Enjoy with whipped cream or a scoop of ice cream!


        1. Sourdough Babka with Strawberry Jam

          Sourdough Babka with Strawberry Jam

          Baking Blessing

          May your kitchen be filled with the warmth of the oven and the joy of creation.
          May the work of your hands nourish both body and soul.
          As this bread rises and bakes, let your heart rise too.

          Be grateful to the One who gives us our daily bread.

          Ingredients:

          Dough:

          • 3 1/2 cups bread flour
          • 1/4 cup sugar
          • 1/2 cup whole milk
          • 1 1/2 tsp salt
          • 4 large eggs
          • 6 Tbsp unsalted butter, softened
          • 1 cup active sourdough starter

          Filling & Finish

          • Strawberry jam (enough to spread thinly over two 10×14-inch rectangles)
          • Sweetened cocoa powder, for dusting (optional)
          • 1 egg + 1 Tbsp water, for egg wash (optional)

          Plan Ahead:

          Feed your starter the night before so it’s nice and bubbly by morning.


          Directions:

          In the morning, combine the flour, sugar, and milk. Add the salt, eggs, butter, and active sourdough starter. Knead until the dough is smooth and glossy, about 10–15 minutes. It will come together as it kneads.

          Cover the bowl with plastic wrap or a damp towel. Let it rise in a warm spot until it doubles in size. This should take about 6–8 hours.

          Once risen, refrigerate the dough for a few hours or overnight so it’s firm and easy to shape.

          When ready to shape, turn the chilled dough onto a lightly floured surface and divide it into two equal pieces. Roll each piece into a 10×14-inch rectangle.

          Spread a thin layer of strawberry jam over each rectangle, leaving a 1-inch border on one short end. If you like, dust lightly with sweetened cocoa powder.

          Starting from the opposite short end, roll up each rectangle into a log. Use a sharp knife to slice each log lengthwise. This will expose the layers. Then twist the two strands together. Make sure to keep the cut sides facing up. Tuck the ends under gently.

          Place each twist into a greased standard 1 lb. loaf pan. Cover and allow to rise until puffy and nearly doubled, about 4 hours.

          Preheat your oven to 350°F. Brush the tops with egg wash if you’d like a glossy finish. Bake for 40–45 minutes, until golden and set.

          Let the loaves cool in their pans for 10 minutes before transferring to a rack. Slice and enjoy warm, or let cool completely for cleaner slices.

          This sourdough babka combines tender dough with the brightness of strawberry jam. It’s a loaf that feels just right for sharing over coffee. It is also perfect for gifting to a friend or lingering over in a quiet afternoon moment.

        2. Delicious Sourdough Chocolate Chip Muffins

          Delicious Sourdough Chocolate Chip Muffins

          Even the simplest baked goods become a feast when shared with grateful hearts and the goodness of God.

          Ingredients:

          • ¾ cup sourdough starter
          • 2 eggs
          • ¼ cup melted butter
          • 1 tsp vanilla extract
          • 3 Tbsp milk
          • 2 Tbsp Greek yogurt
          • 1¼ cups all-purpose flour
          • ½ cup granulated sugar
          • 1 tsp baking powder
          • ¼ tsp salt
          • ½ cup chocolate chips
          • Extra sugar, for sprinkling

          Instructions:

          Set your oven to 350°F. Line a muffin pan with papers or lightly grease.

          In a large bowl, whisk together the sourdough starter, eggs, melted butter, vanilla extract, milk, and yogurt.

          Stir in the flour, sugar, baking powder, and salt.

          Gently fold in the chocolate chips to make a soft batter.

          Scoop about 3 tablespoons of batter into each muffin cup, filling them just about halfway. Sprinkle a little sugar on top for added sweetness.

          Bake for 18–20 minutes, or until the tops are light golden and/or a toothpick comes out clean.

          “This is the day the Lord has made; let us rejoice and be glad in it.”
          Psalm 118:24